Showing posts with label craft. Show all posts

Saturday, December 14, 2013

DIY Golden Animal Ornaments

This winter I've been gearing up for the Christmas season with a bit of decorating and crafting! One of my favorite crafts of Christmas time is creating the ornaments for the annual ornament exchange several of my girlfriends do! This year I opted to try something totally different from last time. I created little wintery scenes inside a plastic globe ornament. 

What you need: 
- Small animal figurines
- Gold acrylic craft paint 
- Large plastic globe ornaments that open in half vertically
- Winter Trees (sized to fit in the globes you choose) 
- White Glitter 
- Ribbon 
- Hotglue gun 

Here is how you make them:
1. Prep your little animals by painting them gold! This may take several coats and can be done with gold spray paint or a paintbrush and acrylic paint. Beware that this step takes a little time allowing the paint to dry between coats. 

2. Heat up the hot glue gun and choose which animals will go with which tree and approximately where you want them positioned. 

3. Hot glue the bottom of the tree and animals inside the ornaments. I chose to put a tree on one half of the ornament and the animal in the other, this allowed for best placement when closed.

4. After the animals and trees are secured carefully dump some white glitter in the bottom half of what will be the back of the ornament. (My glitter ended up sticking to the sides a bit, which is why I suggest trying to aim it towards the bottom of the backside) 

5. Close the ornament by attaching the front half (side with animal). I decided to add a drop of hot glue on the bottom seem of where the two halves meet to help them stay closed! 

6. Tip it upright and watch the glitter fill the scene like snow! 

7. Add ribbon or another type of attachment to hang the ornament! 

8. Hang on the tree and admire your pretty little winter scene! 


Merry Christmas! 


Friday, December 21, 2012

Bridal Shower in a Box


If you haven't read the story behind this box click here! This post will give you all the details behind how I planned and executed a long-distance-bridal-shower!

Here is how I created the box:
First I chose a theme. I settled on "Snow and Winter" since she was all the way down in Texas missing out on a pretty northern winter (although we haven't much snow up here yet!) Then I gathered inspiration and ideas. Mostly I was inspired by shopping but once I got the idea I made a secret pinterest board for some inspiration. I unlocked it and you can look at it here: A Box of Winter

Next I went shopping and started crafting and assembling the box...
here is what was inside:

 Decorations:
A Banner!
 How to: 
Take Gold Tissue paper fold it in half and cut strips.
Sew a ribbon in the folded part leaving room for ties on either side. 
Take pretty papers and write your message!
Sew a pretty accent ribbon to join the pieces of paper to make a banner.
Use clothes pins to hang both banners together.

Snow Garland! 
How to:
Take paper, Styrofoam balls, cotton balls, yarn, a big needle, and ribbon.
Begin stringing the yarn through paper snowflakes, cotton, and Styrofoam balls.
Add a ribbon at the top in order to tie it to something.
Add a small cardboard snowflake at the bottom to weigh it down. 
This can be hung from floor to ceiling or draped like traditional garland.

A Bride-to-Be Sash
 I looked high and low for a not totally overpriced, tacky, or trashy bridal sash and could not find one. So I ended up making one!
How to: 
Supplies: Pretty fabric, Puffy Paint, Thread
Cut out long even rectangles of fabric (long enough to go from shoulder to hip)
Iron them in half.
Iron down one of the corners on each to create the tail of the sash
Sew together neatly using machine.
Add the desired saying on the sash and let dry! 
(for more detailed instructions contact me)

Food and Favors:
Hot Chocolate! 
 For this I took hot cocoa packets and emptied them into small jars. 
I added chocolate chips and marshmallows to the mix to add some extra fun. 
Garnished with a ribbon and peppermint stick! 
(Bottom Right Photo) shows the left over hot cocoa packets- 
wrapped up all pretty with the instructions carefully cut out and placed inside. 

Other Food and Small Gifts
Some other fun gifts we added (pictured above) include:
Dark Chocolate Peppermint covered pretzels
Hot Chocolate Cupcake Mix
Fake Snow in a can
Pine smelling candle. 

Cupcake Liners
I added a box of winter cupcake liners to go along with the mix! 

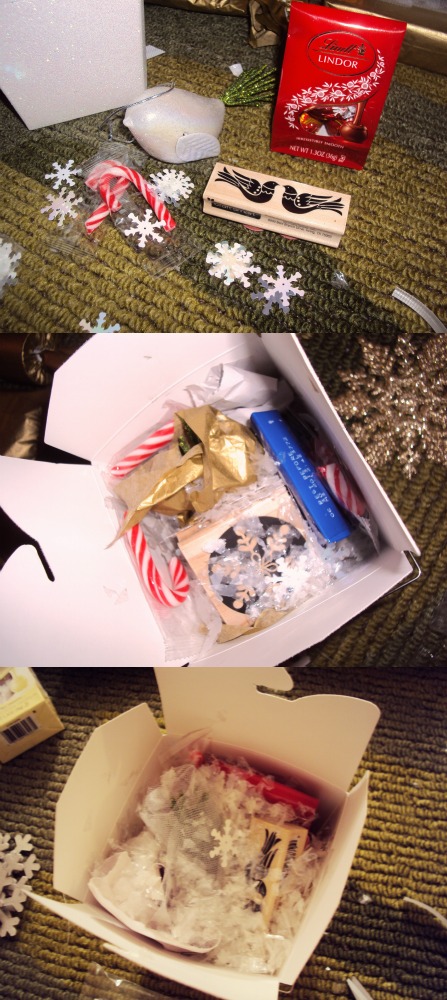
Little boxes for the bride and groom.
 Each box included: 
A small bag of chocolate
Candy Canes
A white lovebird ornament
A Stamp
Fake snow and tulle

Packing the Box:
This was where a lot of the snow came in. 
Top Left: Everything wrapped up and ready to go in the box. 
Top Right: First Layer
Middle Right: Second Layer
Bottom Left: Final Layer- Rocking tons of fake snow
Bottom Middle: Bridal sash and note to explain what is in the box.
Bottom Right: An envelope on the outside of the box to tell her she is not allowed to open the box yet and should call me for further instruction. 


Even though this was a bridal shower box- it was heavily focused on snow and winter- I hope this brings you some inspiration for the holidays! 

Monday, November 5, 2012

DIY Chalkboard on the Cheap

This may be my final bedroom update post for awhile. For those of you who remember I have been slowly adding to my bedroom since we moved into the apartment. Yesterday I added an awesome personal touch to jazz up a huge white spot on the wall; a Chalkboard. I have been looking for ideas for this awkward white space foe a long time now and finally it came to me- chalkboard paint obviously. So I started considering my options. I thought about painting the wall, but honestly I felt like it would be so expensive and such hard work for that tiny small space. Plus I've already painted some crazy stuff on my walls, I wanted something I didn't have to 100% commit to. So I decided to do add a chalkboard that could attach to the wall. I looked at decals, but they were so expensive and I probably couldn't use it more than once. So I assessed what I already owned to see what I could come up with. I already owned chalkboard spray paint (which has been invaluable in making some awesome things and only cost about $7). All of the sudden it came to me- I should spray paint poster board! I wasn't sure if this would work but spending a dollar on a piece to try it seemed like a good option. So far so good. Just grab your spray, do a few thin coats of paint and let dry. It's not exactly like a chalkboard, but I can mostly erase it, and write on it with chalk so it totally works for the situation at hand. I hung it up with four tacks (1 in each corner).  Essentially this project cost me $1 and hardly any time. It spruces up the white spot on the wall and lets me use it and change the images however I want.

Here are some pictures to give you an idea of what the chalkboard looks like in my room. :) And a little Maggie Love for all of you!


 Happy Monday! Have a great week!

Tuesday, July 31, 2012

Thrifty DIY Gifts

Hello Readers! I feel like my posts have become few and far between recently! I am so sorry for that, but my summer has been outrageously crazy. I just took about a 2 week trip up to Canada with stops in Lockport, Lancaster, and New Milford before making it home! I went up to Canada for the wedding of one of my best friends, Alyssa Magee Lowery & her fiance husband Joshua Lowrey! It was a beautiful wedding, and I was thrilled to be a part of it! Here is a preview of the beautiful couple! Many more pictures to come!


When I returned home we went into an immeadiate weekend celebration of my sister's birthday! She turned 24 today! Happy Birthday Gabrielle! This morning in honor of her birthday my mom, sister and I made mixed berry scones from scratch and played parcheesi!

Either way the point I am trying to make is... what do weddings, birthdays, and travel have in common?
That's right you guessed it... money. Spending money. I couldn't get around not spending the money on my gas and since I have been very low on cash lately I had to cut my funds where the gifts were concerned. I hope that like the quote says, "It's the thought that counts"; Alyssa, Josh and Gabby won't be offended by this post revealing how little I spent on their gifts since I did invest time, love and creativity into them instead!

So for all of you money strapped crafters out there I have three easily personalized and creative, but most importantly cheap gift tutorials!

Gift 1: Customized Mugs

Cost: $ 2.00 


Gift 2: Chalkboard Coasters

Cost: $ 10.00 


Gift 3: A Line a Day Calendar 

Cost: $ 5.00 


Gift 1: Customized Mugs 

Supplies 

Sharpies 
2 mugs ($1 each at Dollar Tree)
Inspiration and Imagination
Oven

Directions: 

Draw a design on the mug using Sharpies. 
(I found that black works very well and colors show up lighter than normal)
Don't forget to think about doing both sides of the mug! 
Here I stole an idea from A Beautiful Mess for one side of the cup 
and did a super mushy love message on the other side. 


Idea: Write a cute phrase, names, or try an abstract drawing! 

Once you are happy with your design place on a baking sheet and in the oven at 350 degrees for 30 minutes! 

Tip: Add a tag for the cup to explain care of mugs.


Important Note: 

Once you carefully remove the cups from the oven let them cool completely before washing or using! 


Gift 2: Chalkboard Coasters

Supplies 

4 tiles (.35 at Lowes) 
Chalkboard Spray Paint (about $7 at Ace Hardware) 
Felt Adhesive (about $2 at walmart) 
Chalk (.50)


Directions: 

Find a well ventilated area (i.e. outside) and lay out your four tiles. 


Spray a light but even coat of the chalkboard paint and allow time to dry. 
Do several layers until well coated. (I did 3) 

Next take your felt adhesive and cut the size backing you want. 
Apply to chalkboard tile. 


Tip: Watch the thickness of the felt backing you buy. Mine was thick so you can see the coasters are a little high off the table. 


Make sure you wait 24 hours before using any chalk, and when you do start by doing a light chalk coating on each tile first. 


Erase the chalk coating, write your message and wrap with a pack of chalk! 


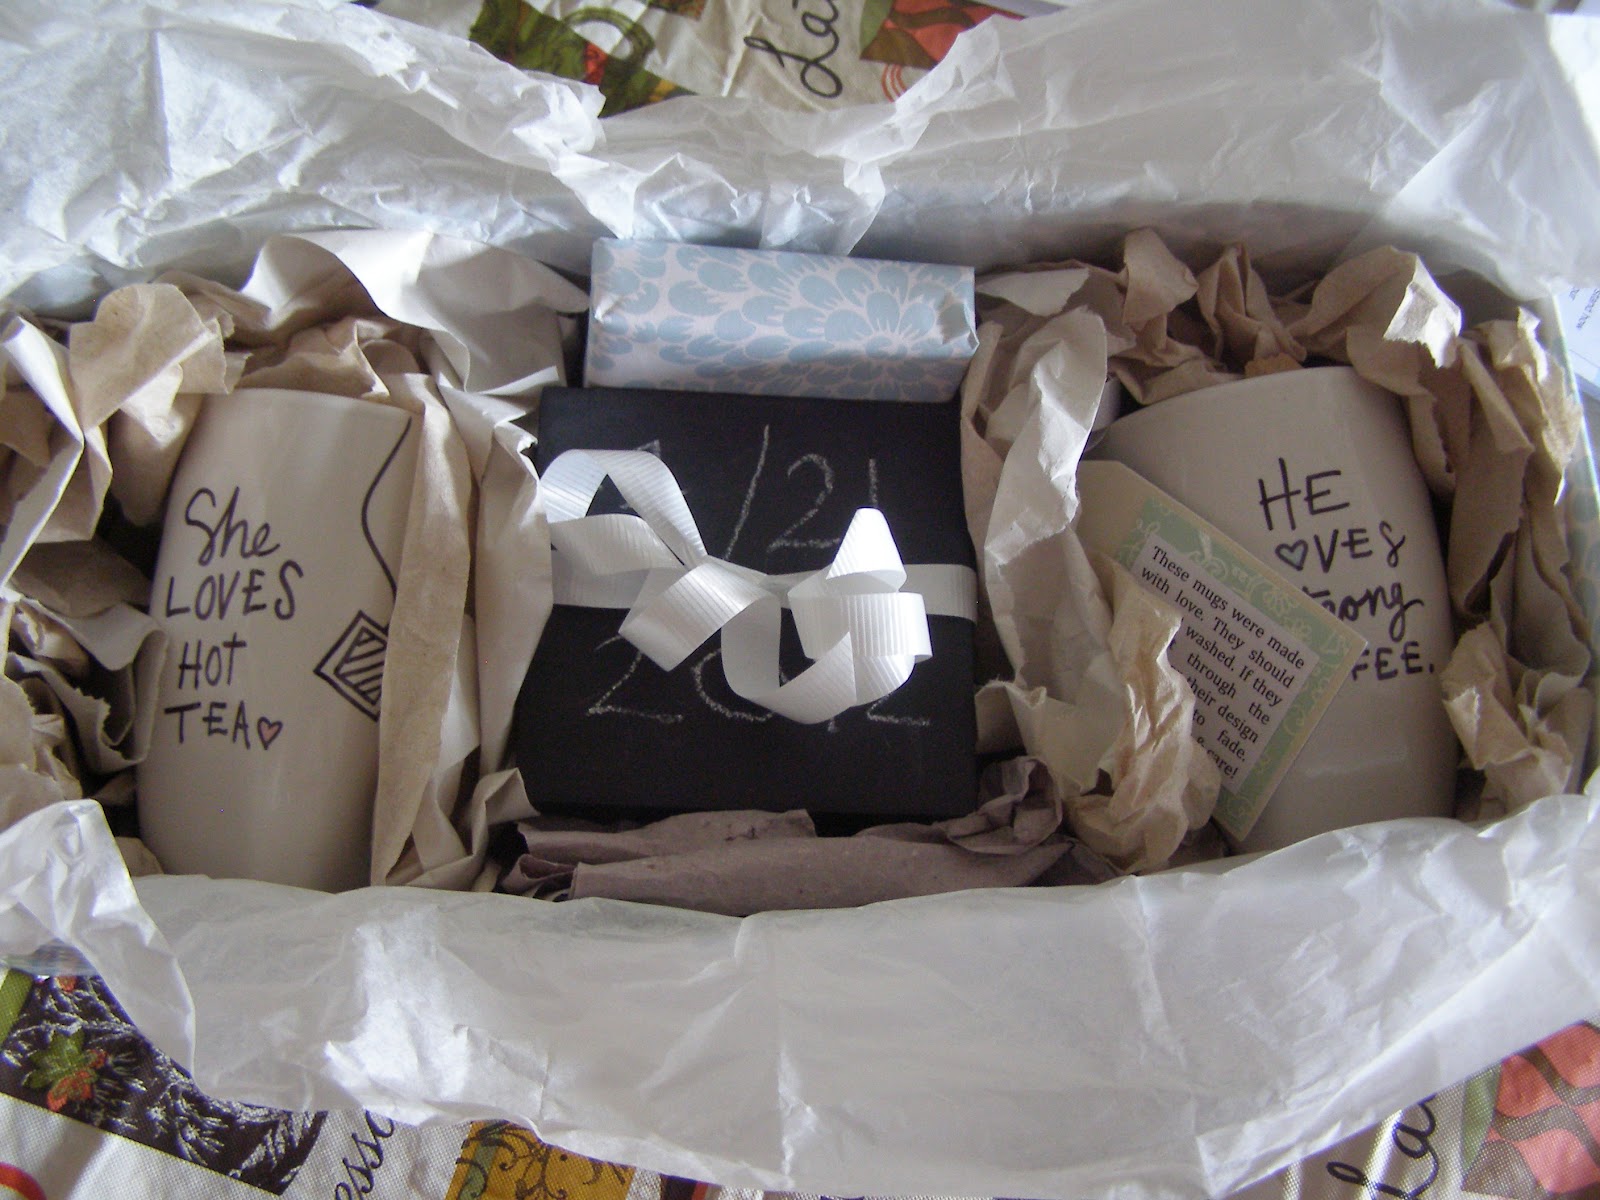
When I gifted this I combined gifts 1 & 2 for a cute mug/coaster combo. 
Here's how I wrapped it up! 


Pictured above Left to Right: Her Mug, 4 coasters and a box of chalk, His mug & washing instructions


Gift 3: A Line a Day Calendar

Supplies 

379 large index cards (Dollar Tree 100 pack $1 each) 
Markers or Stamps
Basket, Carton or Container of some sort (Thrift Store $1) 
Pretty Paper for Dividers 

Directions 

Take your index cards and start writing! Label the day on each card. You get to really design and personalize each thing. I did the first day of the month with the month and 01 and color code on it. The following days contained only the date in the coded color.

Tip: Try using stamps for a more uniform look or markers for a more handwritten feel


Next make your dividers. Take an index card and place it on the desired colorful paper. Make the divider slightly taller than the card so it will stick out of the stack! Make 12 dividers for each month... I decided to label the back of the dividers and leave the fronts plain! 


*Notice how the dividers are sticking out above the index cards and are all different patterns! 

Next make an explanation card to explain to your giftee to explain what they should do with this calendar. 

Lastly place all of the cards in the container of choice. I purchased a basket and tied it with a bow! 


Here is my sister's first entry into her Line a Day journal: 

Tip: Add little headings on important holidays like the person's birthday, anniversary, or other big holidays! 
Also don't be afraid to try different things. Here is the original project that inspired mine. It has some differences from mine and will give you another great example of creative ways to make this project! (click here) 


I hope you have enjoyed all these craft/ cheap gift ideas. Most don't take a very long amount of time and are nice gifts for a wide variety of people. Not to mention cool enough to make for yourself as a cheap treat! You better believe I am making a mug and calendar for me once I get a free minute :) Have a lovely day all. I look forward to posting again very soon! 


Monday, January 23, 2012

good ideas for a good day!

Happy First Day Back To School-Mansfield!

I have always loved first days. Of school, of a new year, of a new job, of anything. They offer this feeling of excitement and hope. I believe that I usually make a bigger deal of my first day of school in the fall, but I felt bad leaving my winter first day- out in the cold (pun intended). Here is a post of wonderful winter ideas to celebrate a new beginning for us all. 

Idea 1:
restyle that scarf!

Check out this video posted at Ruche for 3 easy but new ways to style your scarf!
Or watch the video below! 

Idea 2:
 don't be friends with Jack Frost!


What you need:
Spray Bottle
2/3 Vinegar
1/3 water
Just spray on windows and ice will melt away!

Idea 3:
recycle the sweaters that you won't wear!


Learn how to turn a cozy sweater into even cozier mittens!

 Idea 4:
Keep your feet nice and dry!


Learn How and Why 
you should waterproof those shoes this winter!


 Idea 5:
Reorganize your space! 

  Take another tip from Ruche 
and reorganize, and clean your closet! 
Did mine yesterday- (pictures to come)

That is all of the good ideas I could muster up this morning, but there are so many more out there. Take today to think of a few ways to improve your lifestyle for this new beginning!
 

Monday, January 9, 2012

Magical Tent of Wonder (which also serves as a Fort)!

A little while ago Gabby and I made a Fort! I had been seeing so many lovely pictures of forts on Pinterest, and other blogs and I wanted one so badly to cozy up in! Lucky for me Gabby also has the spirit and imagination of a five year old so we set out to build a fort. 7 suitcases, 1 tote, 1 picture frame, 1 drying rack, 1 large sheet of cardboard, a few tacks, a shower curtain, a sleeping bag, a quilt, and 7 sheets later... we had ourselves a FORT! enjoy the pictures and video tour below!

The Outside
 Another outside shot!
 Door Closed...
 Door Open!
 Watch this next clip and get the full tour! (So worth it!)
A glance at the lamp, high ceiling, and lights!
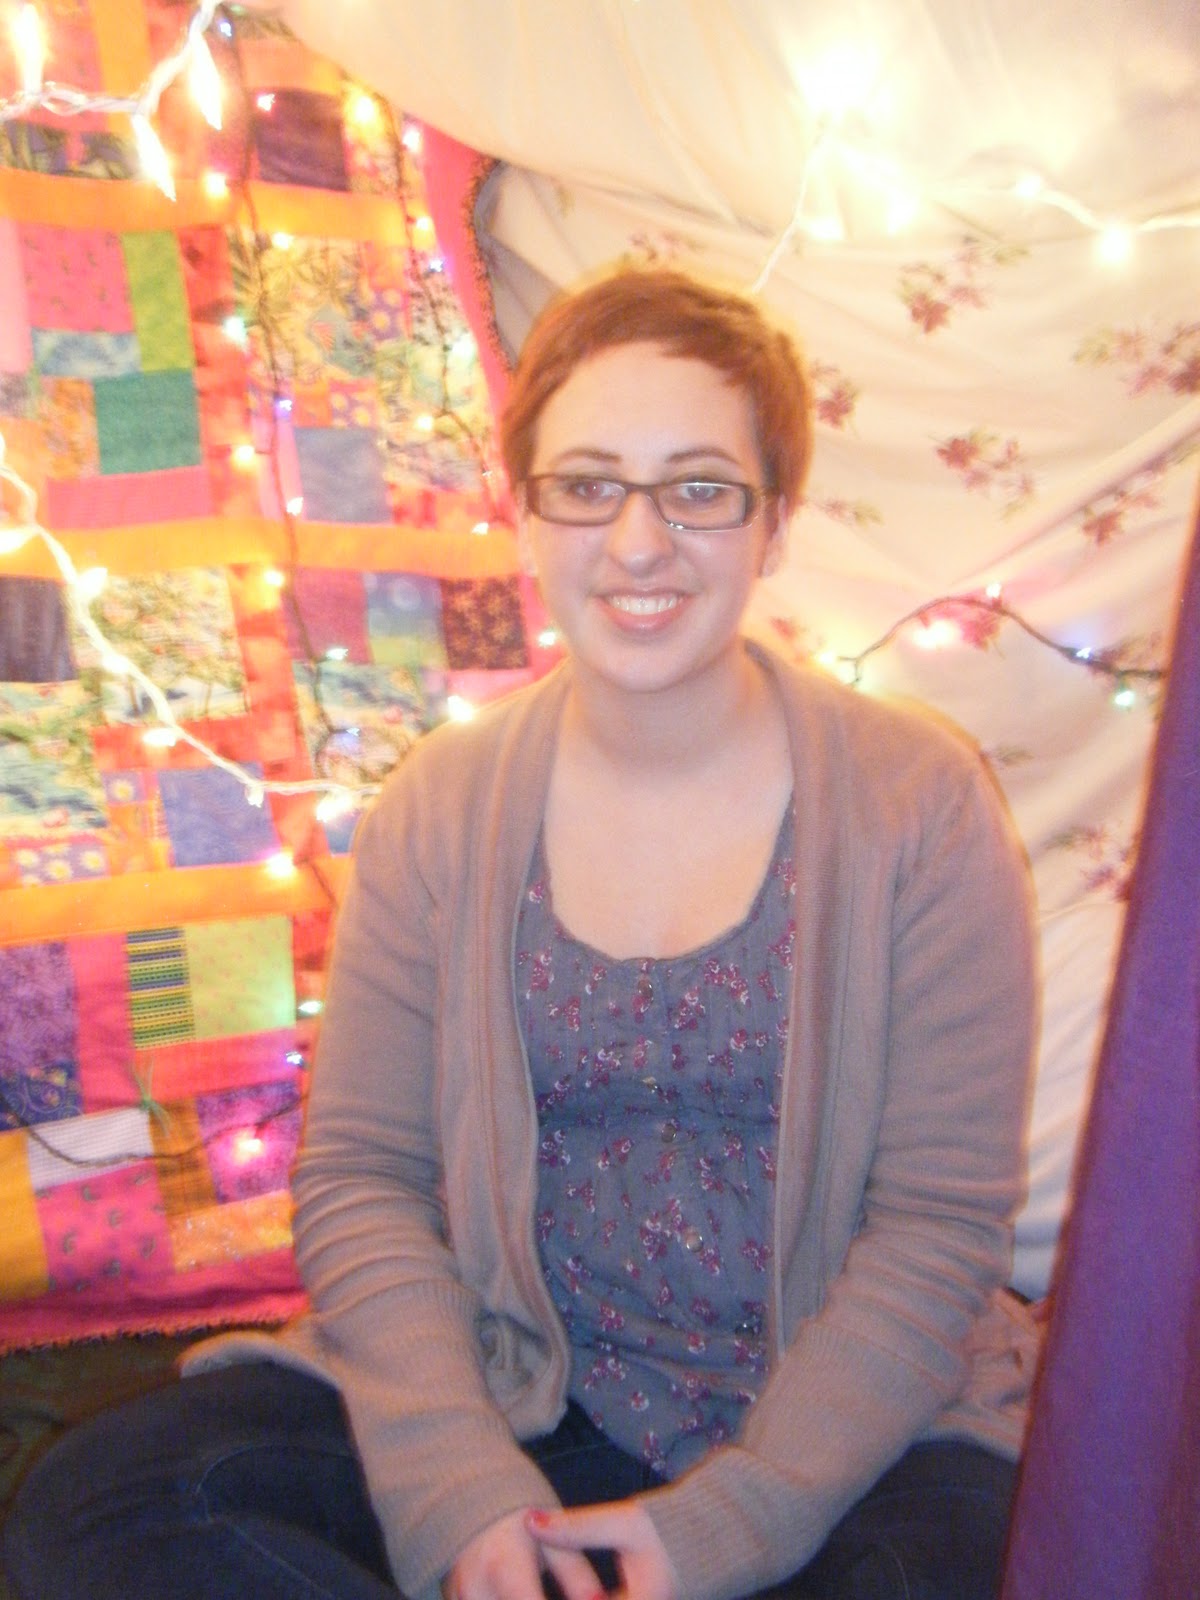
 Gabby enjoying the coziness :)
 Me- also clearly being cozy
 Macey returning to reek havoc on the fort... 
or be cute,
who can tell?
 There is enough room to lay on the floor and stretch out!
 And even enough room to stand!
 Me: hard at work
in the fort
writing a blog post, 
about the fort. :)

I hope this post will inspire at least a few of you to make your own fort! 
Happy building!